
THE ZERO-WASTE
Flora Obscura KAFTAN
The Zero Waste Flora Obscura Kaftan is a pattern-free sewing project designed to be simple, beautiful, and approachable for all skill levels. With its flowing silhouette and minimal geometric construction, the kaftan has remained a timeless garment for generations—comfortable to wear, flattering on many body types, and wonderfully easy to sew together.
No paper pattern is needed for this project because we’ll be working directly with simple body measurements and full lengths of fabric. By using entire rectangles of cloth rather than cutting traditional pattern pieces, the process creates little to no fabric waste after construction. It’s a thoughtful, low-waste approach to garment making that celebrates both creativity and simplicity.
Flora Obscura Zero Waste Kaftan: CHOOSING FABRICS
I encourage the use of natural fibers that feel fluid, soft, and beautiful against the body. Fabrics with an elegant drape will allow the garment to move effortlessly and showcase the sculptural simplicity of the pattern.
Personally, I especially love working with a midweight silk charmeuse or a lightweight cotton for this project. Both lend themselves beautifully to the flowing silhouette while allowing botanical prints and natural dyes to truly shine.
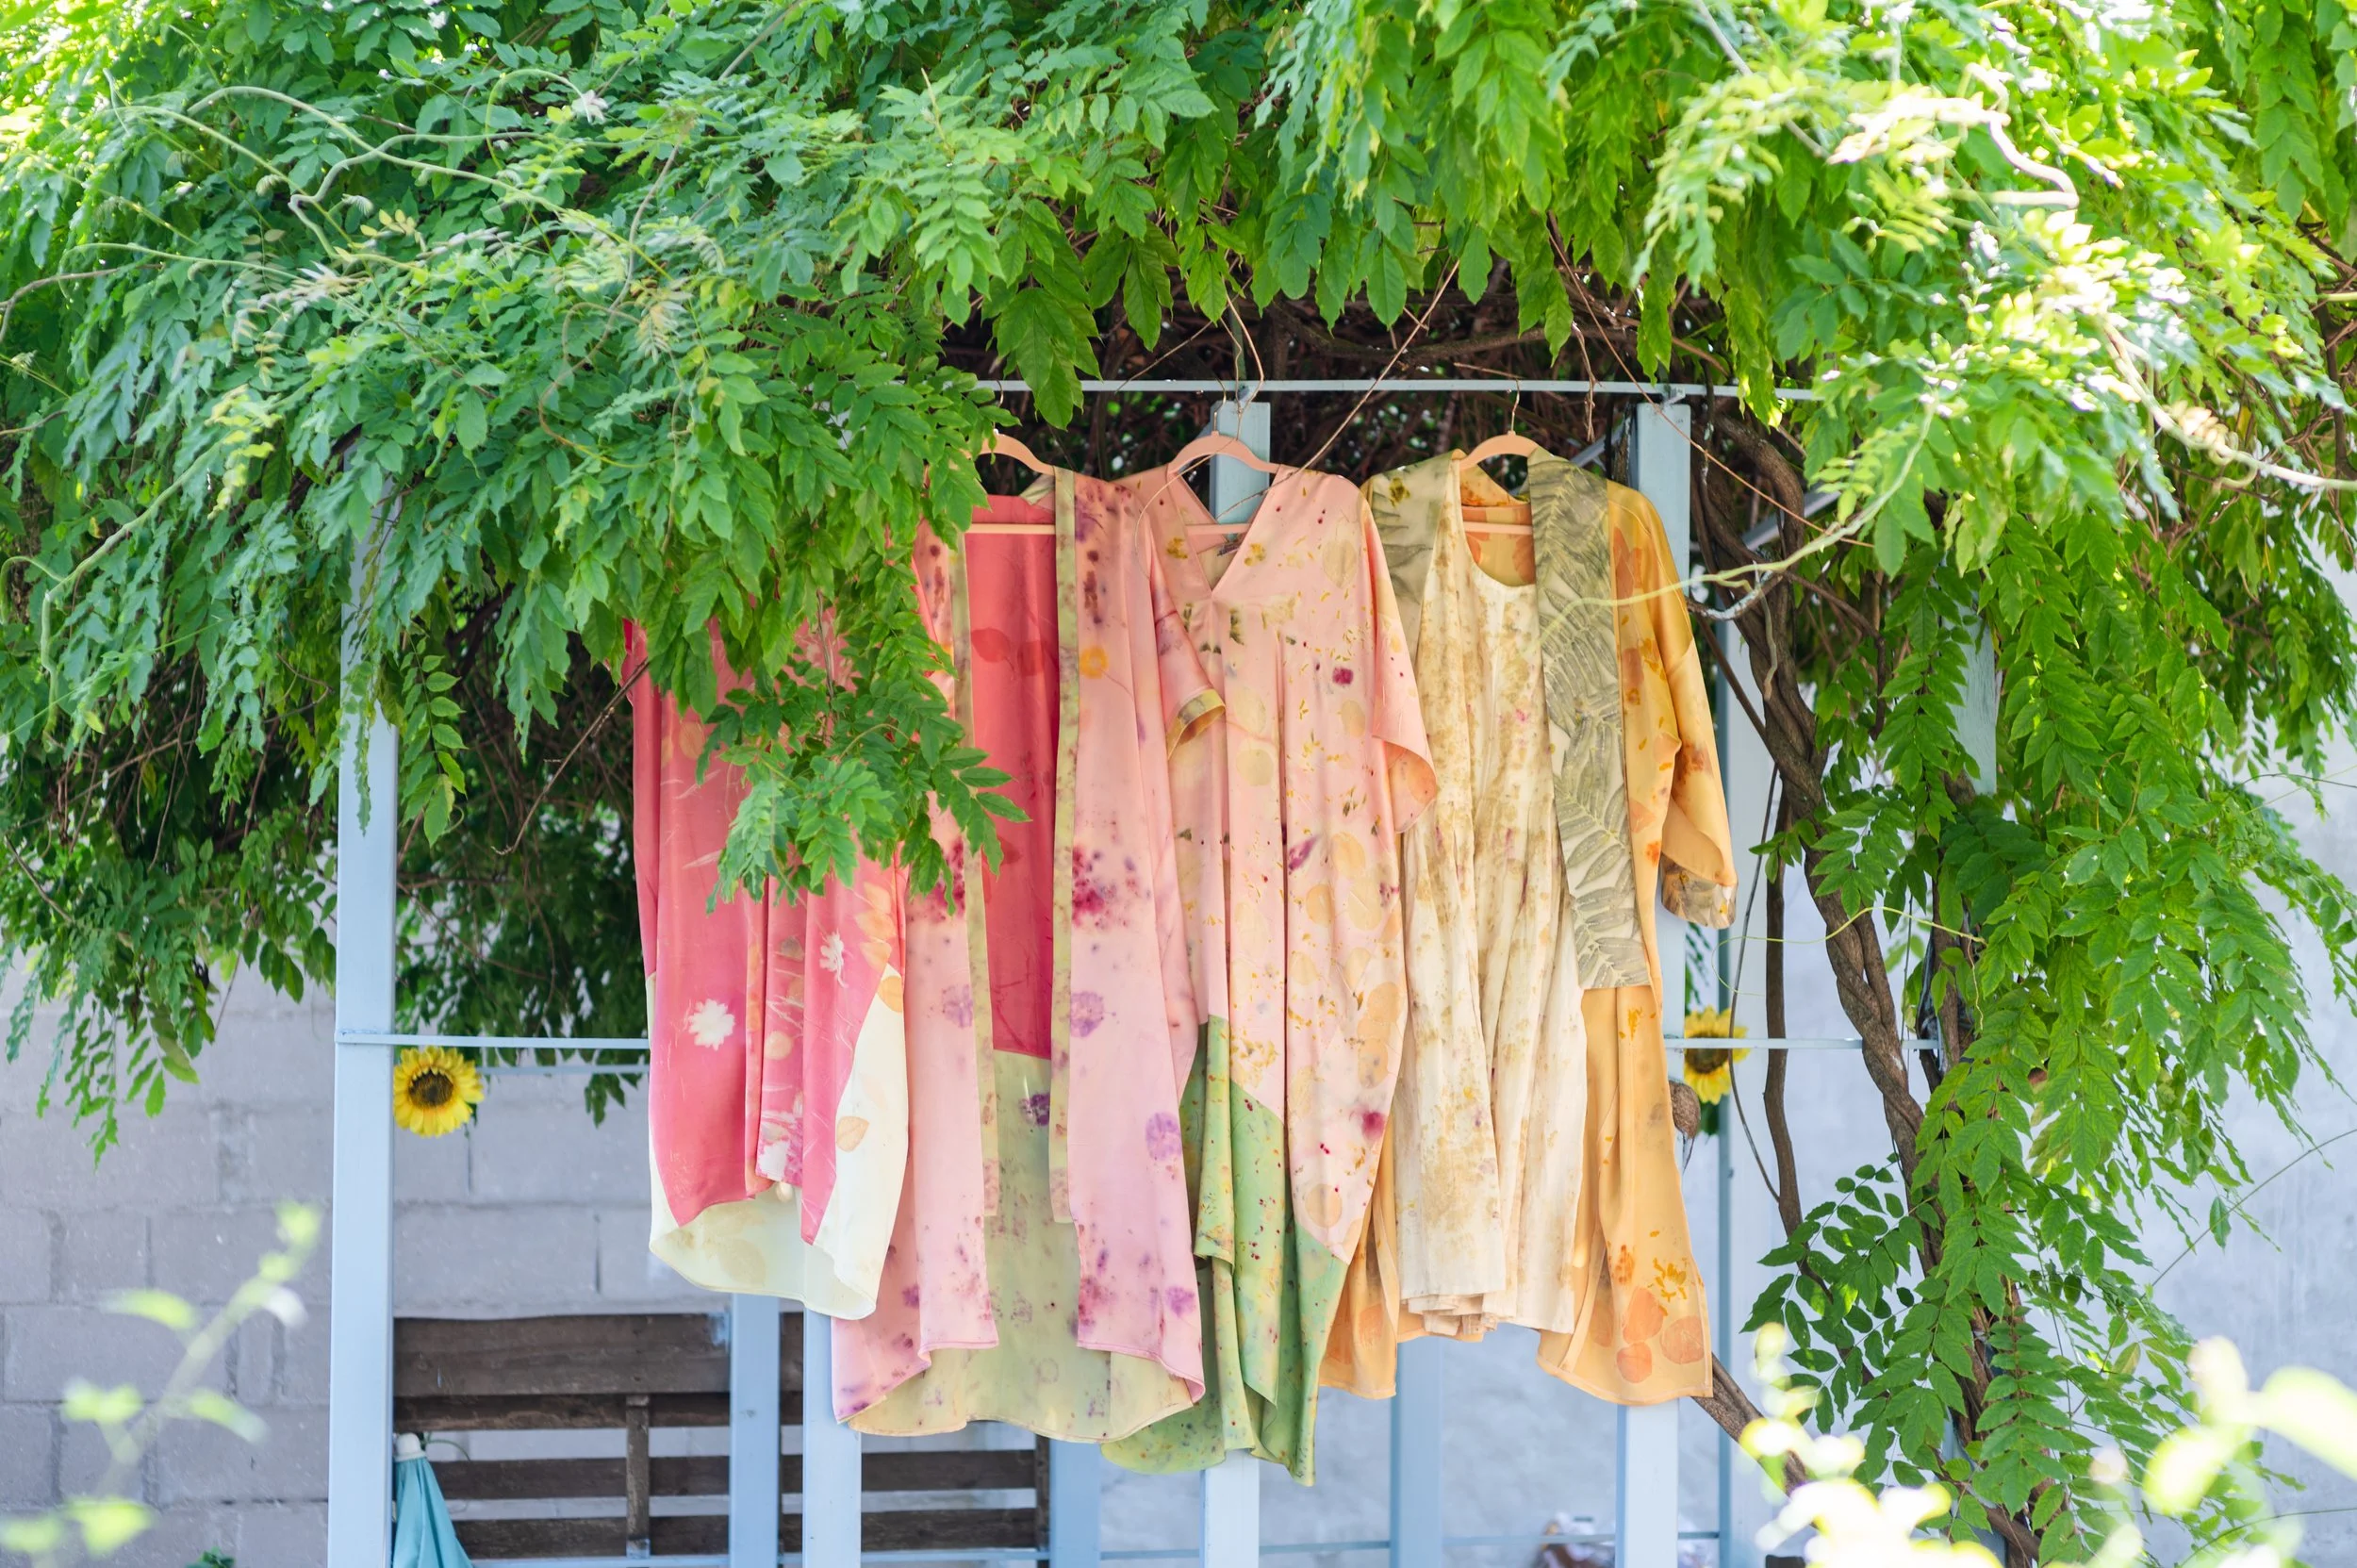
Of course, I highly recommend using your own botanically printed fabrics for this garment whenever possible — it transforms the kaftan into a deeply personal wearable textile artwork. But truly, the world is your oyster when choosing fabrics you love and feel inspired by.
Suitable fabrics include:
Silk charmeuse, crepe de chine, dupioni, silk/wool; Lightweight cottons, Linen, Rayon, Viscose blends
Not recommended:
Knits, stiff fabrics like denim, heavyweight fabrics
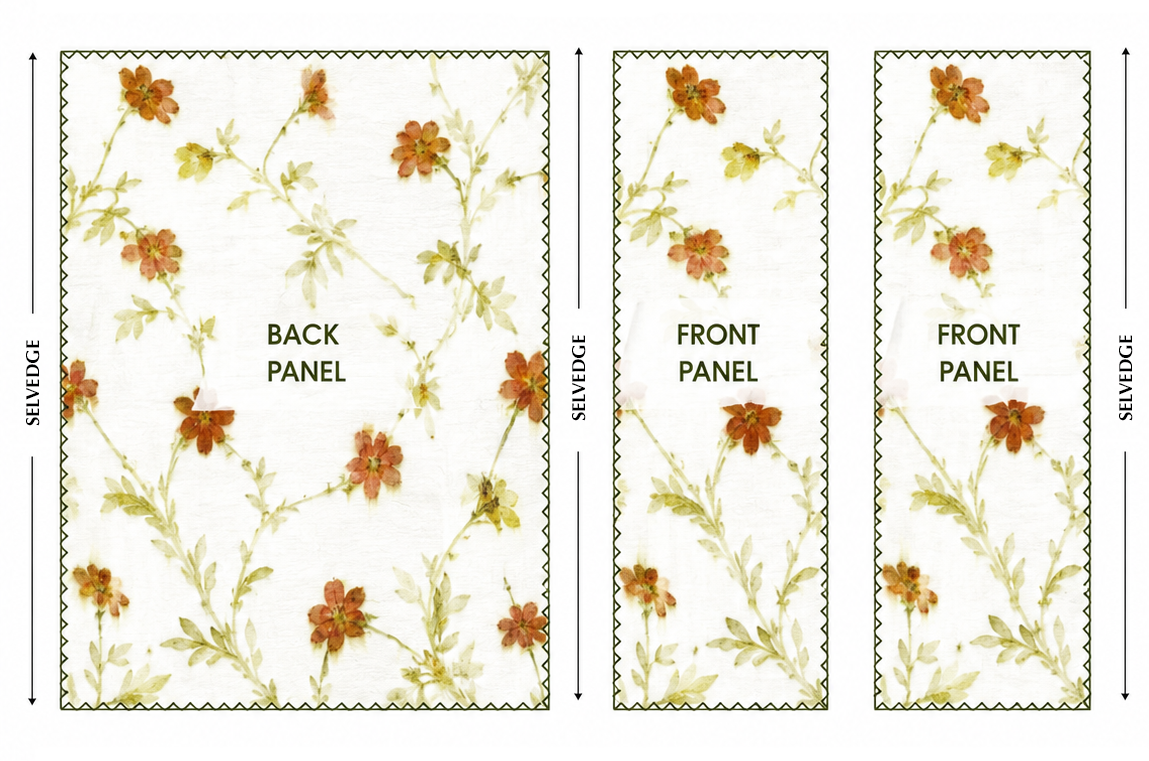
SELVedGE & PATTERN CONSIDERATIONS
Keep in mind that there is a center front seam running along the full length of the kaftan. The selvedge will most likely run along each outer edge. When selecting patterned or botanically printed fabrics, consider how motifs, borders, or directional prints will align across these seams. I find a mirror-image print to be quite perfect for this design.
The kaftan pictured here is made from a silk/wool voile— a very soft and slightly sheer fiber, it takes prints beautifully. This a quite a delicate fiber and requires careful sewing so as not to cause any tearing
Determining the Width of Your Kaftan
The width of your kaftan is determined by the width of your fabric from selvedge to selvedge. Because this is a zero-waste garment, the fabric width becomes the width and drape of the finished silhouette.
Selvedge Edge:
The selvedge is the finished woven edge that runs along both long sides of the fabric. It prevents fraying and helps determine the full usable width of the textile.
Pro tip: If you don’t have a serger or overlock sewing machine, you can leave the selvedge edges unfinished as they will not fray.
Most fabrics are commonly produced in widths of approximately:
34–45” wide — often found in silks, cottons, and lighter apparel fabrics
54–60” wide — commonly used for garments, linens, and home textiles
Approx. 1.5 yards of 54”–60” wide fabric can be used as the full width of a slimmer, narrower-fitting kaftan.
Determining the Length of Your Kaftan
The length of your kaftan is completely up to the wearer and personal preference. Some people prefer a shorter, breezier style, while others love a dramatic floor-length silhouette.
I personally like mine to fall a few inches above the ankle, which is approximately 45" long.
To determine how much fabric you’ll need, take your desired finished length and multiply it by two, since the garment is made from a front and back panel.
For example:
Desired length: 45"
Front + back panels: 45" × 2 = 90" total fabric length
Since 1 yard of fabric equals 36", you’ll need approximately:
1.25 yards for each panel
2.5 total yards of fabric for the complete kaftan
customization:
TRIMMING EXCESS WIDTH—
If you’re working with an extra wide fabric and prefer a slightly narrower fit, you can trim off the outer edges of the kaftan from the shoulder seam down to the hem on each side. This creates four long fabric strips that can be sewn into a tie belt or sash to cinch the waist and add shape to the garment.
These rectangles of fabric have many uses: ribbons, scrunchies, bands or contrast panels.
SEWING Step 1:
Using an overlock (serger machine) or zig zag stitch, finish the top and side edges of all 3 pieces. The selvedge edges along the sides may be left raw, as the woven selvedge naturally resists fraying. The hem will be finished with a double fold and can also be left raw until hemming.
SEWING Step 2:
Place the two front panels right sides together. On the wrong side, mark 1” down from the top edge and pin. Then mark 13–15” down from the top edge to determine the neck opening and pin again.
The space between the two marks will remain unsewn as the neck opening.
Sew a short seam 1” long from the top edge. Then sew from the second mark to the hem.
Press the seams open flat from the inside with an iron. With the right side facing up, topstitch 1/4” from each side of the seam, catching the pressed seam allowance around the neck opening.
Pro tip for Custom Fit: When creating a new design, it’s important to check the fit as you go. Before topstitching, slip the neck opening over your head to see how it drapes. Is the V deep enough? Too deep? Adjust the opening as needed by adding or removing stitches, then secure your stitching.
SEWING Step 3:
Shoulder seams— With front and back pieces right sides together, pin the top edges to create the shoulder seams.
Sew across the top edge. Press the seam towards the back, then topstitch 3/8” from the seam.
SEWING THE SIDE SEAMS — Sew the side seam from the lower edge of the armhole down to the hem
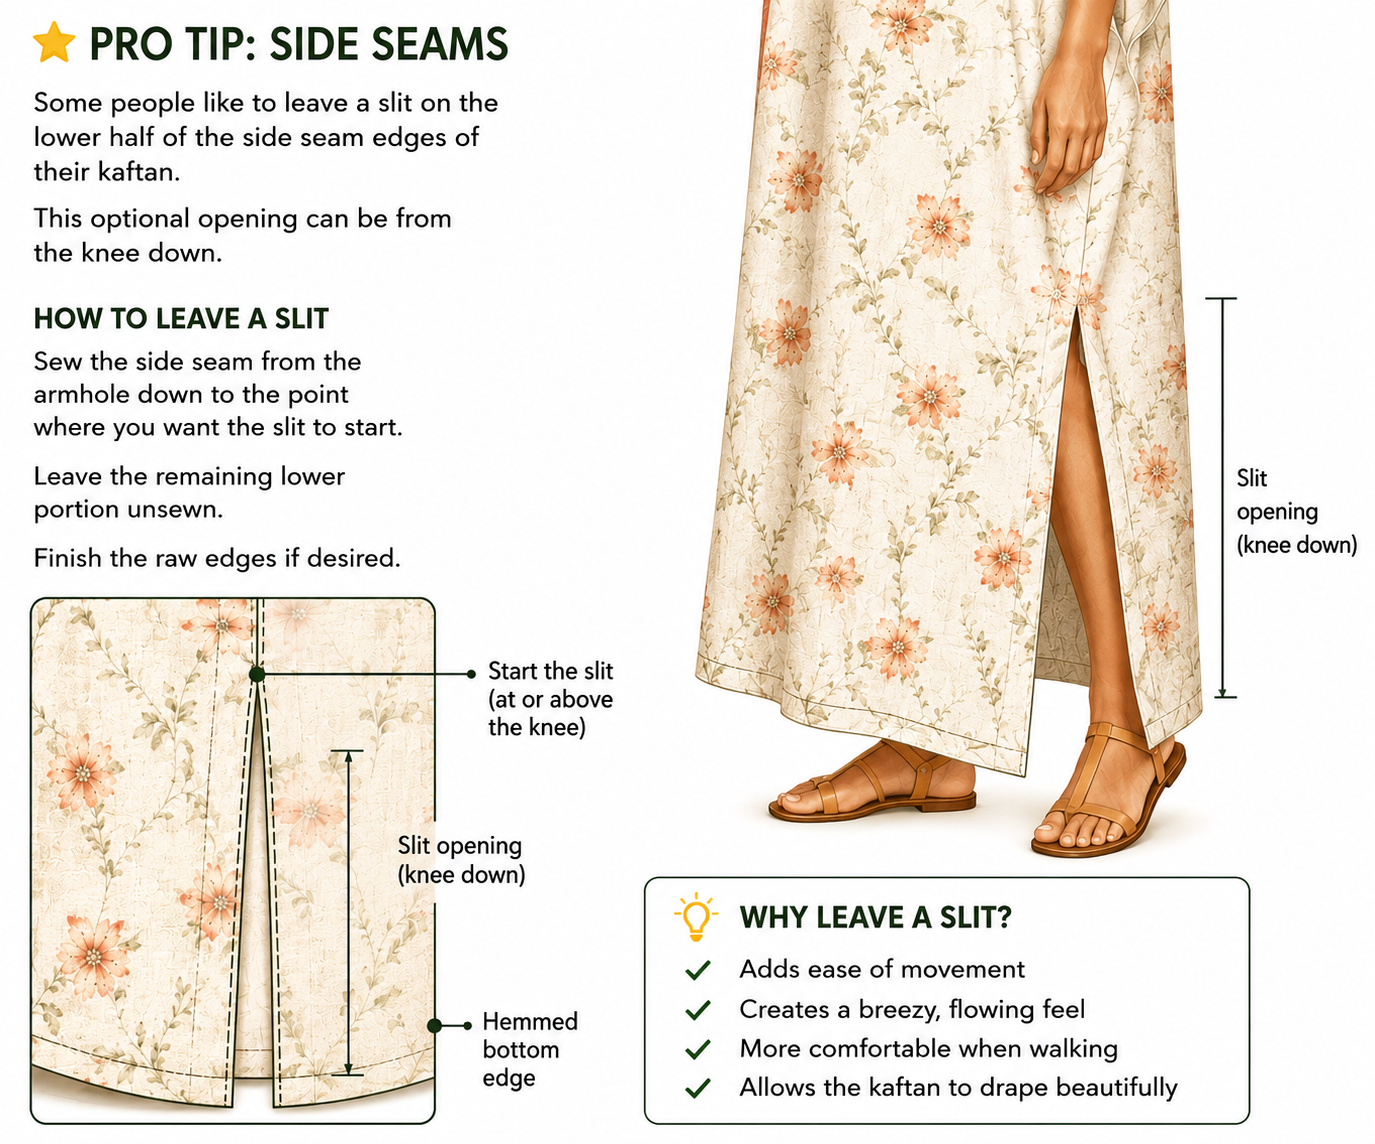
HOW TO LEAVE A SLIT— Sew the side seam from the lower edge of the armhole down to the point where you would like the slit to begin. Leave the remaining lower portion unsewn.
Start the slit at or above the knee
Leave the lower portion open for ease of movement
Before hemming, topstitch the slit edges with 1/4”
Hem each side of the opening individually for a clean finish
Step 6: Hemming the kaftan— Try on your kaftan to decide where you would like the final length to fall. Keep in mind that the front will naturally hang slightly higher than the back when worn.
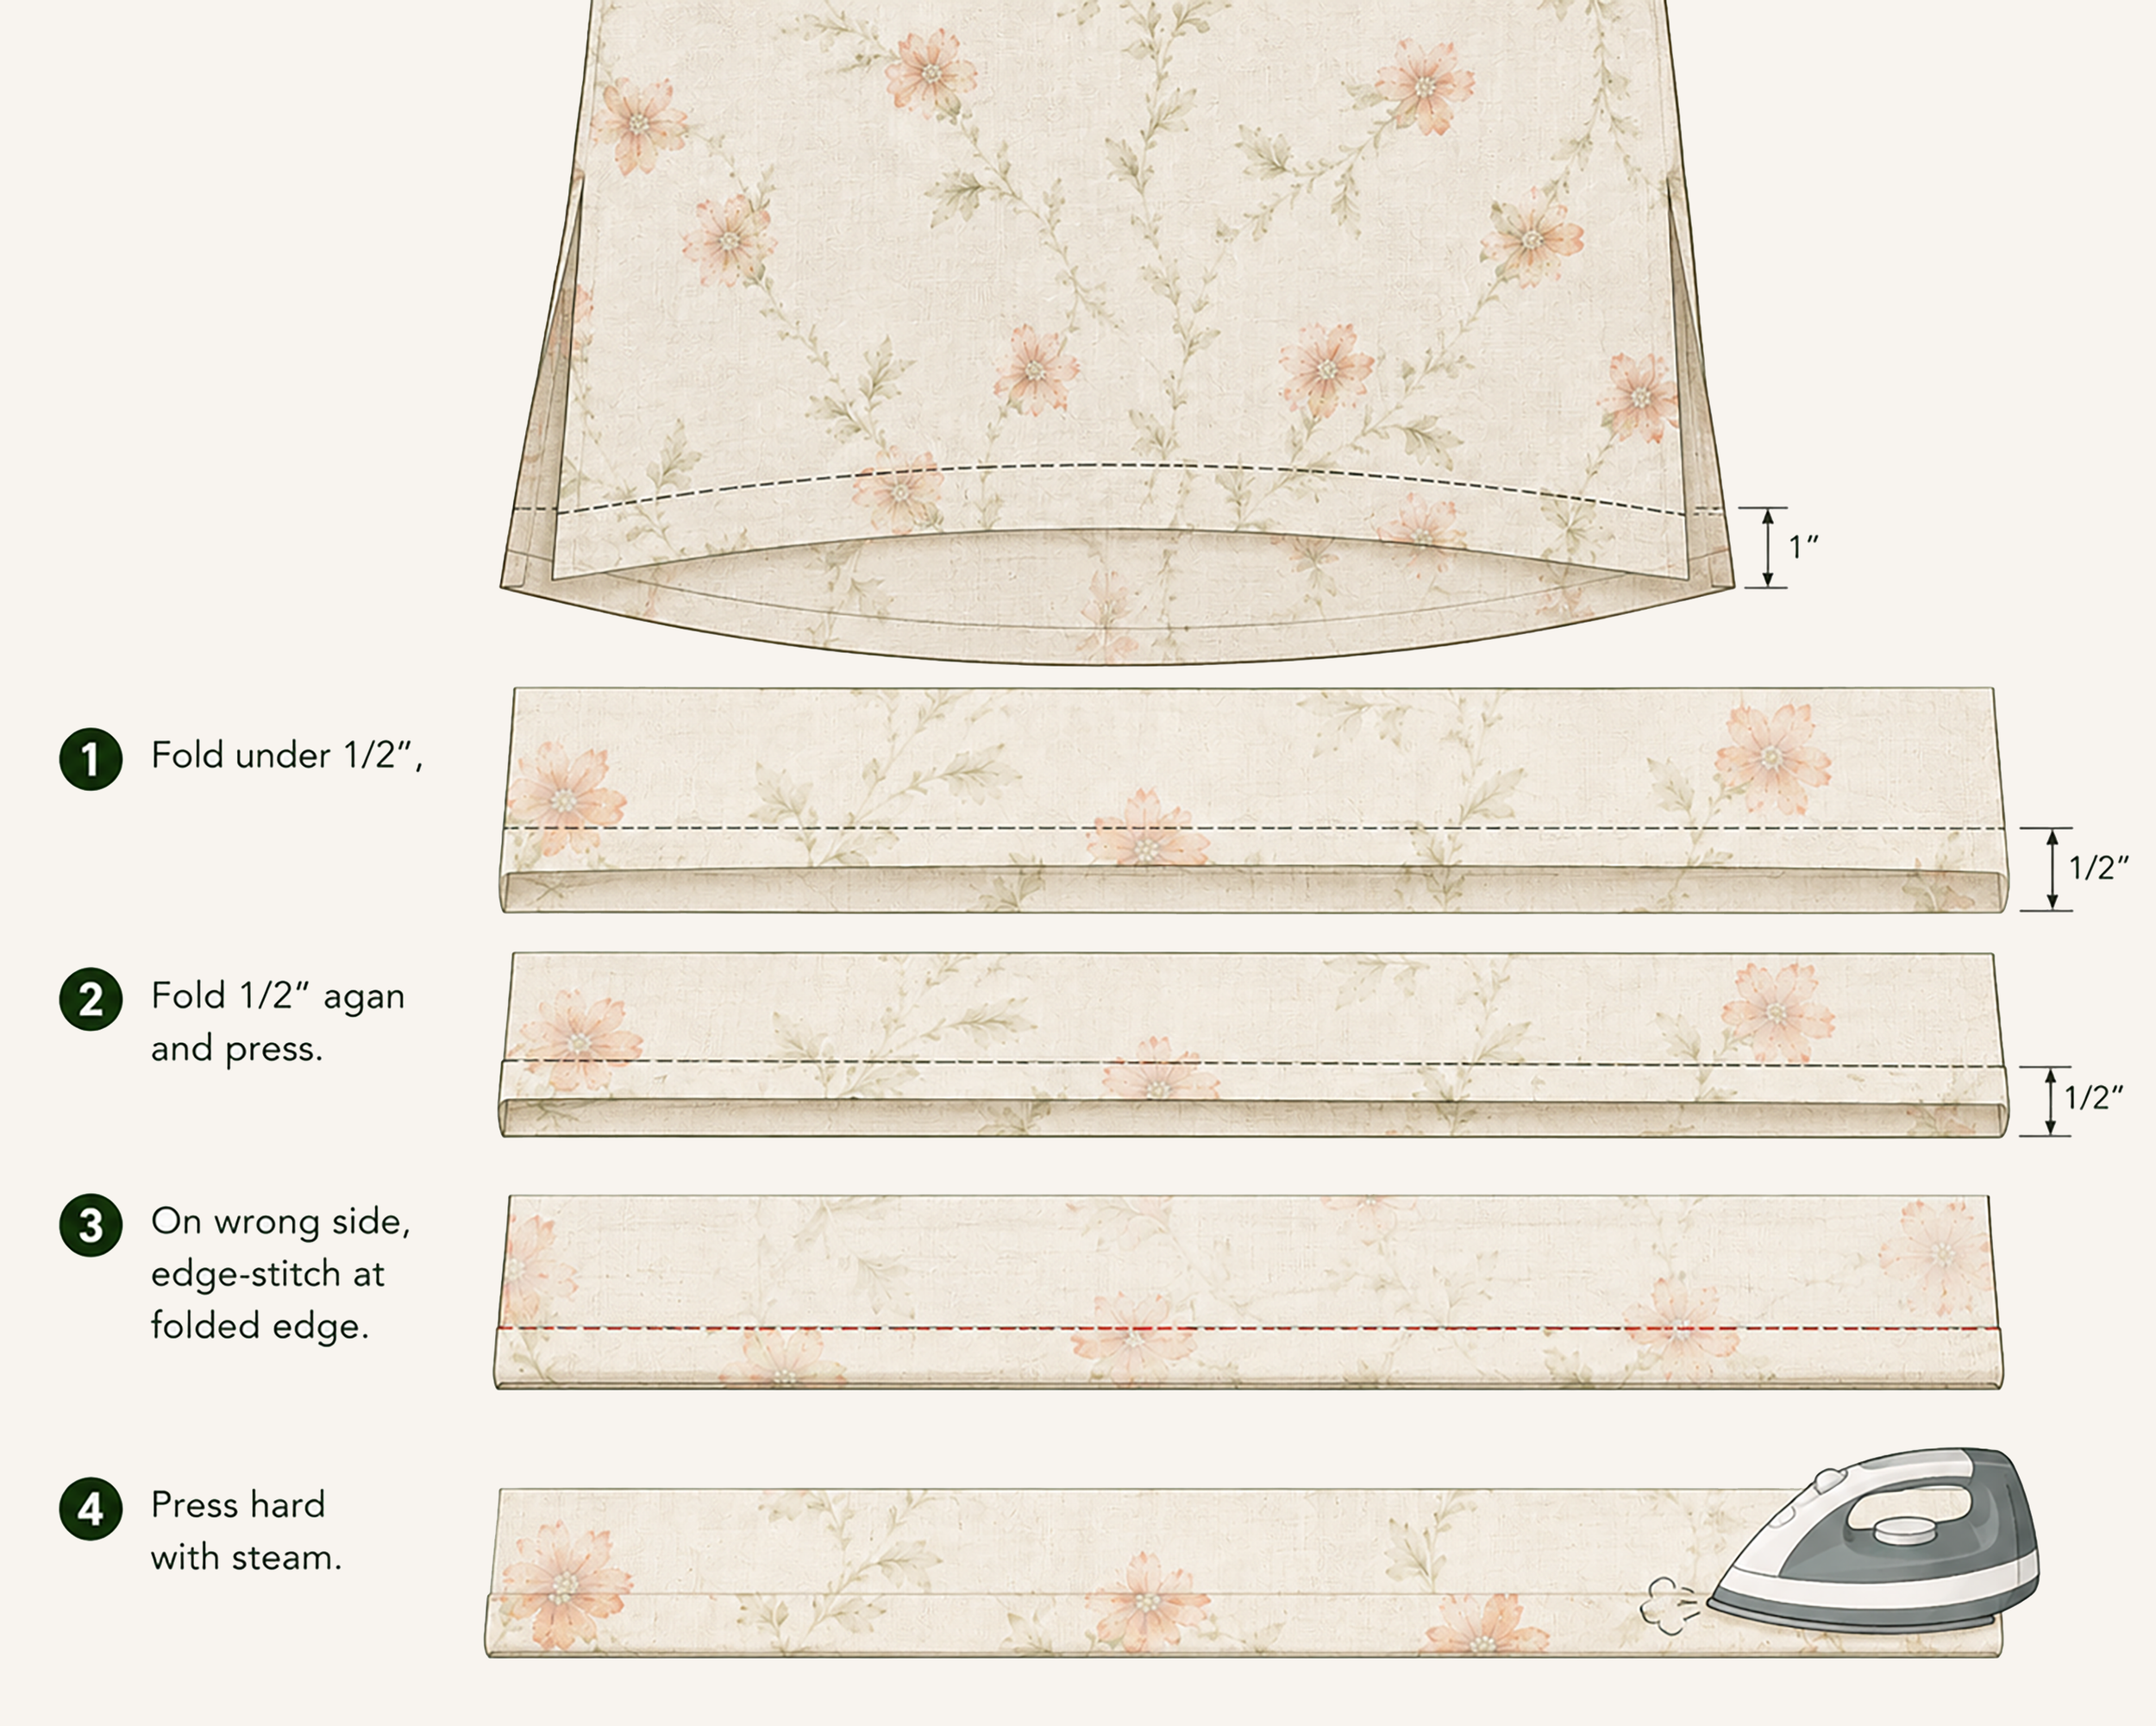
Trim the hem if needed, allowing a 1” seam allowance for a clean double-fold hem.
Fold the raw edge under 1/2”, press, then fold under another 1/2” and press again. On the wrong side, edge-stitch close to the folded edge. Press well with steam.
SEWING Step 4:
Armhole Opening— I prefer an armhole opening of around 20” total in diameter— 10” front and back, as it provides comfort and ease when putting on and wearing the kaftan.
Mark and pin 10” down from top edge.
Pro Tip for Custom Fit: For example, if your upper arm measures 14” around, an armhole opening of approximately 9–10” when folded (creating an opening circumference of about 18–20”) will allow for comfortable movement and an easy fit.
SEWING Step 5:
Finishing the Armhole — With the right side facing up, begin topstitching approximately 3” above the side seam using a 1/4” seam allowance.
Sew downward toward the side seam. Leave the needle in the fabric, pivot to sew straight across the seam, then pivot again and continue sewing upward toward the shoulder seam, catching the folded edge of the armhole with your stitches. When you reach the upper armhole, pivot again, sew across, and pivot back down to the strating point.
FINISHING— To neatly finish the raw edges of the sash, tuck the raw ends inward about 1/4" after turning the tube right side out. Press the folded edges flat with steam, then topstitch close to the edge to close the opening and create a clean finish.
For an even more polished look, you can also topstitch around the entire sash about 1/8" from the edge to help it lay flat and keep the seams crisp.
HOW TO MAKE A
CONTRAST BAND
Choose a contrasting fabric for approximately the bottom 1/3 of the front and back panels.
For example, if your desired kaftan length is 50" long, cut the upper section to 33" long and the contrast band to 16" long. Repeat for back.
For the front panel only, first follow Step 2 and sew the front kaftan together, creating the center front seam and neck opening.
Next, attach the contrast bands to the lower edge of both the front and back panels. Resume to step 3.